Thursday, 7th August 2014

Today in the morning, I reached IUAC (Inter University Accelerator Cenre ) New Delhi. Started working on the experiment program codes with Ajith sir. We got the air-track set-up for doing the mechanics experiments. Repeated some of the motion related  experiments to study the changes required.

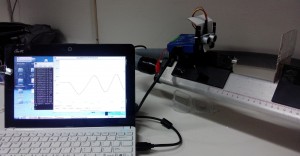
We modified the program for using srf module to plot position time graph. Now we can fetch the position-time data and store it in a file and then plot the p-t, v-t and a-t graphs.

We wrote another program to plot this graph in real -time. This program enables students to see the graph in real time as the glider moves on the air track. Here is the experimenta set up…

airtrack


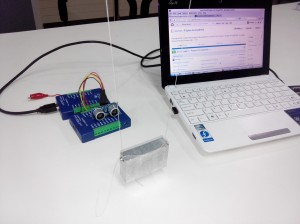
We also set-up a pendulum experiment using a thick metal block and suspended it using  long strings to have a pendulum of large time period.

The program is written to plot the position of pendulum using motion sensor. Committed the same to Git repository. The plot shows the smooth sine curve of oscillations.

IMG_20140807_173110

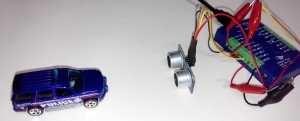
Tried the experiment with motion sensor using toy cars. this can be an amazing demonstration experiment for highschool students.

toy car

Tomorrow we will work on sound experiments and finish the required programs.


Wednesday, 6th August 2014

Not much work today. Tonight I will be travelling to delhi and will be staying for four days, working on my project in Ajith sir’s teaching lab at IUAC.

Since a lot of work to be done in giving  finishing touch to all the experiments and the code, I have taken leave from college. It will be a good idea to sit at one place where all the facilities are available and work on the project.

I have taken all the required tools, sensors and ExpEYES kits.  We will be working on the programs that I have developed so far and do the necessary modifications.


Tuesday, 5th August 2014

Experiment to obtain Chladni figures is complete with the experimental set up and also the python code access the experiment.

This is the set up we designed and used ……


But It needs to be modified using a loud speaker as vibrations with the inductance coil are not large enough.

Also worked on giving finishing touch to python code of few experiments.


Monday, 4th August 2014

Since yesterday, I am working on giving finishing touch to the programs written so far. To meet all the goals of our project I must complete the Sound experiments part.

Ajith sir has designed a stand-alone variable frequency sine wave generator for my experiments and this will help me to complete almost all the experiments which we have mentioned in the proposal. We have also developed the experiments which are not mentioned in the proposal.

Today I have created a separate pages for few experiments. The page for coupled pendulums experiment is complete with the required information (Its Here).

GSoC Weekly Report 11

( From Monday 28th July 2014 to Sunday, 3rd August 2014)

This week I could develop two new experiments and worked on python code of the experiments developed so far.

Things we did this week….

  • Completed the set-up of sound resonance experiment.
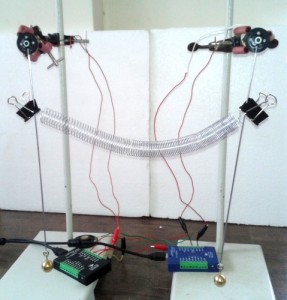
  • Set-up experiment for studying Oscillations of Coupled pendulum. Performed the experiment in three different ways …
    • Both oscillating in phase
    • Both oscillating out of phase
    • One at rest and other oscillating

    Here is the experimental set-up….

    cp1

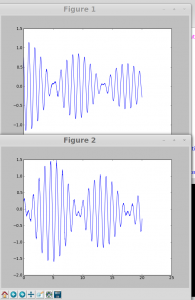
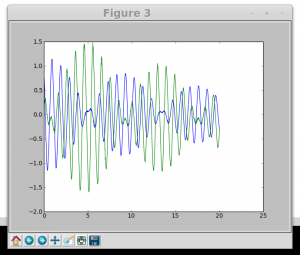
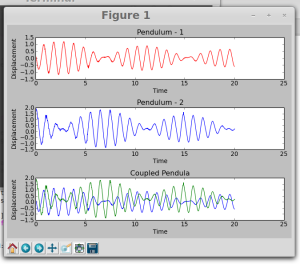
    The waveforms generated using DC motors after amplification…

    coupled pendula1 coupled pendula2 coupled pendula3

    The waveforms show beats as theoretically expected….

    The complete code is here…

  • Worked on another experiment for producing Chladni patterns using ExpEYES. For the experimental Set-up I used a CD as Chladni plate. SQR1 is connected to  a small inductor (a coil of wire with no magnetic core) and produces a sinusoidal magnetic field. This is then placed close to a small magnet attached to the plate, and so produces a sinusoidal force on the magnet. Two small magnets are placed on the edge of the plate. The inductor is placed so its centre is directly beneath the magnets and as close as possible to the plate without touching it.
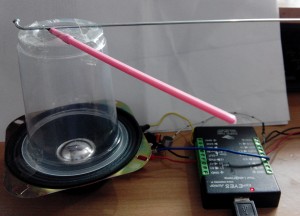
  • on Saturday we could complete the set-up for resonance of cantilever beam  experiment. We used a plastic stick and bicycle wheel spoke as a cantilever beam. A plastic disposable cup is attached at the center of a loudspeaker using  adhesive ( which can be removed easily). Then the cantilever beams are fixed on the top of  the cup using cello tape. The speaker is connected to SQR1 and the frequency is gradually changed. when the frequency matches with the natural frequency of the beam it starts vibrating with large amplitude.

    The variation of resonance frequency with length can be investigated by cutting sections off the end of the plastic stick.

    This is the setup we used….

    resonancecant

    TO DO next week….

  • Work on common GUI for accessing all the experiments.
  • Continue working on documentation and code for all the experiments.

Saturday, 2nd August 2014

Resonance of a cantilever

Today we could complete the set-up for this experiment. We used a plastic stick and bicycle wheel spoke as a cantilever beam.
A plastic disposable cup is attached at the center of a loudspeaker using  adhesive ( which can be removed easily). Then the cantilever beams are fixed on the top of  the cup using cello tape.

The speaker is connected to SQR1 and the frequency is gradually changed. when the frequency matches with the natural frequency of the beam it starts vibrating with large amplitude.

The variation of resonance frequency with length can be investigated by cutting sections off the end of the plastic stick.

This is the setup we used….

resonancecant